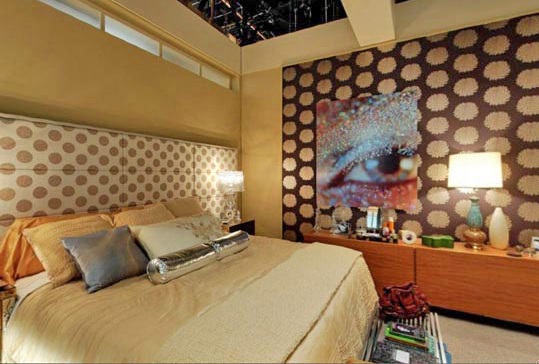
So I finally put my DIY headboard to a test when it came time to redo my daughters room. As you know I was on a serious budget and the DIY tutorials that I watched were just as affordable BUT did I mention I was on a BUDGET...LOL..Yes I had to be resourceful and creative..so while I was having the fabric for my headboard cut, I noticed the cardboard used to roll the fabric was piled high behind the counter. Now the DIY tutorials showed the use of plywood as the base which can run anywhere from $20 and up and of course, the larger size of the headboard, the more $$. I figured if I find a thick piece of cardboard it would hold just as well as the plywood. So I asked the fabric cutter if I could take a few..She said I could take as many as I wanted! FREE = HAPPY ME! So I walked out of there with my 2 1/2 yards of fabric, the 70% off Christmas batting originally priced at $6.99 and my free cardboard. In total I only spent $16!
So here its..Easy peasy!
Measure out the size of your headboard. My rule is to measure your bed and have the headboard the same length but that is entirely up to you. Over sized headboards make a great statement in the room. I made my daughter a side board and made it shorter than the length of her bed to add the decals on each side of it; this was part of the design.
Lay out your fabric face down on a flat surface. Place batting over fabric. (fabric and batting should be larger than the size of plywood or cardboard on all sides; at least 6").
Place plywood or cardboard on top of fabric and batting. Here I have excess batting, so I carefully pulled it off leaving about 3" on all sides. Time to take out that glue gun. If using plywood, use a staple gun.
For more stability, I glued cardboard pieces going the opposite direction.
Pull the fabric over tightly and glue along the edges of the board. Trim off excess fabric.
Since I used cardboard it was easier to hang. I used Velcro strips to stick to the wall. Use mirror hangars if you used plywood.
I was pleased with the outcome and am happy to report that it really is an easy project. Give it a try..
Here are more DIY headboard ideas...
Remember I said that a over sized headboard makes a statement..well this is a great example..Looks like 2 sizes of plywood layered on top of each other with bronze studs bordering the smaller piece for definition. The bold fabric says it all. Love it!
renaekeller.com
Test out your DIY self skills. Make that simple change for the new year. Trust me, you'll love the new and refreshing focal point in your room! ~MG
Test out your DIY self skills. Make that simple change for the new year. Trust me, you'll love the new and refreshing focal point in your room! ~MG


No comments:
Post a Comment